Knowledge Center
Dymo op Raspberry Pi
Using lprint (the easiest way) #
Install lprrint with this command:
sudo apt install lprintadd dymo printer that is on the local network:
lprint add -d dymo450 -v socket://192.168.2.66 -m dymo_lw-450print imagefile to dymo label writer:
lprint -o media=oe_lg-address-label_1.4x3.5in -o orientation-requested=landscape written.pngMore information and website: https://www.msweet.org/lprint/lprint.html
Using CUPS #
We will setup our printer server software CUPS on the Pi. A computer (Raspberry Pi) running CUPS is able to accept jobs from client devices, process them and pass it on to the appropriate printer to print.
Example connecting Dymo LabelWriter 450 (dmesg):
usb 1-1.1: new full-speed USB device number 3 using xhci_hcd
usb 1-1.1: New USB device found, idVendor=0922, idProduct=0020, bcdDevice= 1.12
[usb 1-1.1: New USB device strings: Mfr=1, Product=2, SerialNumber=3
usb 1-1.1: Product: DYMO LabelWriter 450
usb 1-1.1: Manufacturer: DYMO
usb 1-1.1: SerialNumber: 13102208463403
usblp 1-1.1:1.0: usblp0: USB Bidirectional printer dev 3 if 0 alt 0 proto 2 vid 0x0922 pid 0x0020
usbcore: registered new interface driver usblp
Part 1: Install and configure CUPS #
This is relatively easy and only requires a few steps.
1. Ensure your package repository information is up to date, then download and install cups:
sudo apt-get update
sudo apt-get install cups
We need to make some changes to the configuration file of CUPs. The config file can be edited using:
sudo nano /etc/cups/cupsd.confChange/add the following lines to the configuration file. These changes will allow us to interact with CUPS panels.
update the <Location> configurations to allow local user access:
<Location />
# Restrict access to the server...
Order allow,deny
Allow @local
</Location>

<Location /admin>
# Restrict access to the admin pages...
Order allow,deny
Allow @local
</Location>

<Location /admin/conf>
AuthType Default
Require user @SYSTEM

# Restrict access to the configuration files...
Order allow,deny
Allow @local
</Location>
Next we add the Pi user to the lpadmin group. This gives the Raspberry Pi the ability to perform administrative functions of CUPS without necessarily being a super user.
sudo usermod -a -G lpadmin piWe need to ensure that CUPS is accessible across entire network.
sudo cupsctl --remote-any Finally, restart CUPS to effect changes
sudo /etc/init.d/cups restartor
sudo service cups restartPart 2: Install Dymo Printer Drivers #
Install the printer-drivers-dymo package:
sudo apt-get install printer-driver-dymo Output:
Reading package lists... Done
Building dependency tree
Reading state information... Done
The following NEW packages will be installed:
  printer-driver-dymo
0 upgraded, 1 newly installed, 0 to remove and 0 not upgraded.
Need to get 43.2 kB of archives.
After this operation, 134 kB of additional disk space will be used.
Get:1 http://mirror.serverius.net/raspbian/raspbian buster/main armhf printer-driver-dymo armhf 1.4.0-8 [43.2 kB]
Fetched 43.2 kB in 0s (203 kB/s)
Selecting previously unselected package printer-driver-dymo.
(Reading database ... 222813 files and directories currently installed.)
Preparing to unpack .../printer-driver-dymo_1.4.0-8_armhf.deb ...
Unpacking printer-driver-dymo (1.4.0-8) ...
Setting up printer-driver-dymo (1.4.0-8) ...
Processing triggers for cups (2.2.10-6+deb10u4) ...
Updating PPD files for cups-filters ...
Updating PPD files for dymo ...
Updating PPD files for escpr ...
Updating PPD files for gutenprint ...
Updating PPD files for hpcups ...
Updating PPD files for postscript-hp ...
part 3: Adding Printer to CUPS #
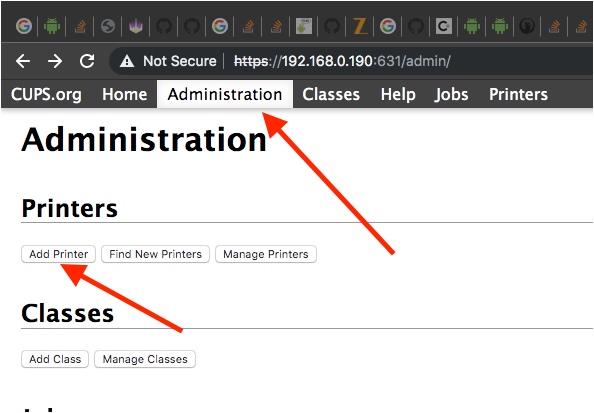
This is the last and most easiest step to do. From your PC, connect to the same network as your Pi. Open a web browser and go to the CUPS homepage by entering your Pi’s IP address followed by “:631” which is port address on which CUPS is communicating. It may be different in case you changed the port. The browser may show a warning “Connection not secure”, click “Proceed Anyway”.
To know your Pi’s IP address, you can run the command hostname -I from your Pi. In my case, the web address is:
https://localhost:631/admin or from an other computer (example):
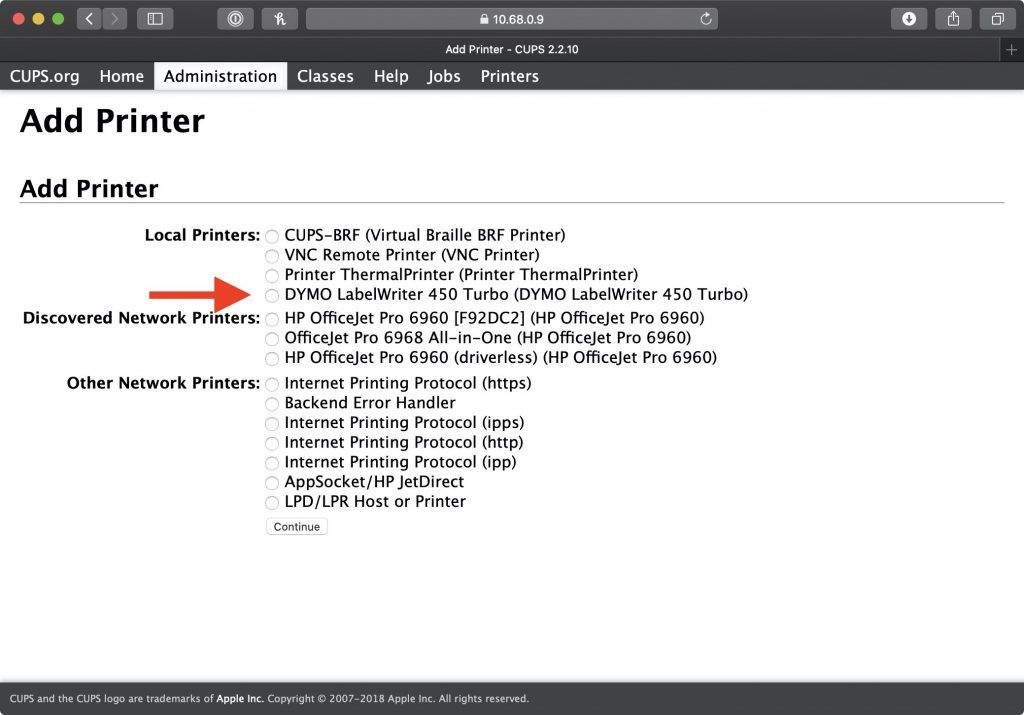
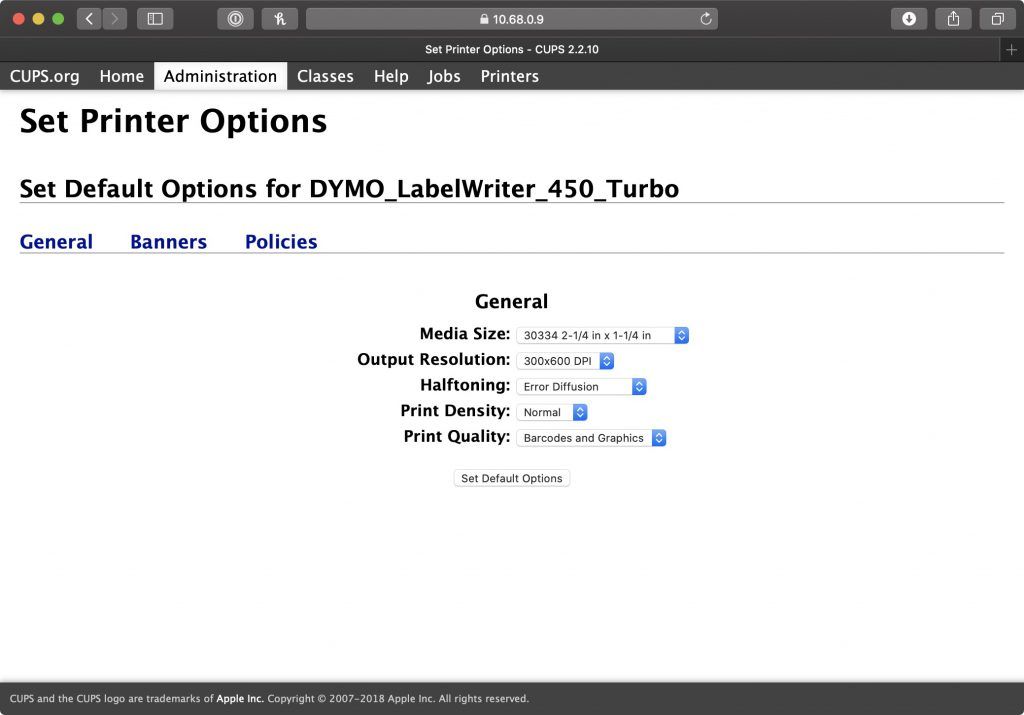
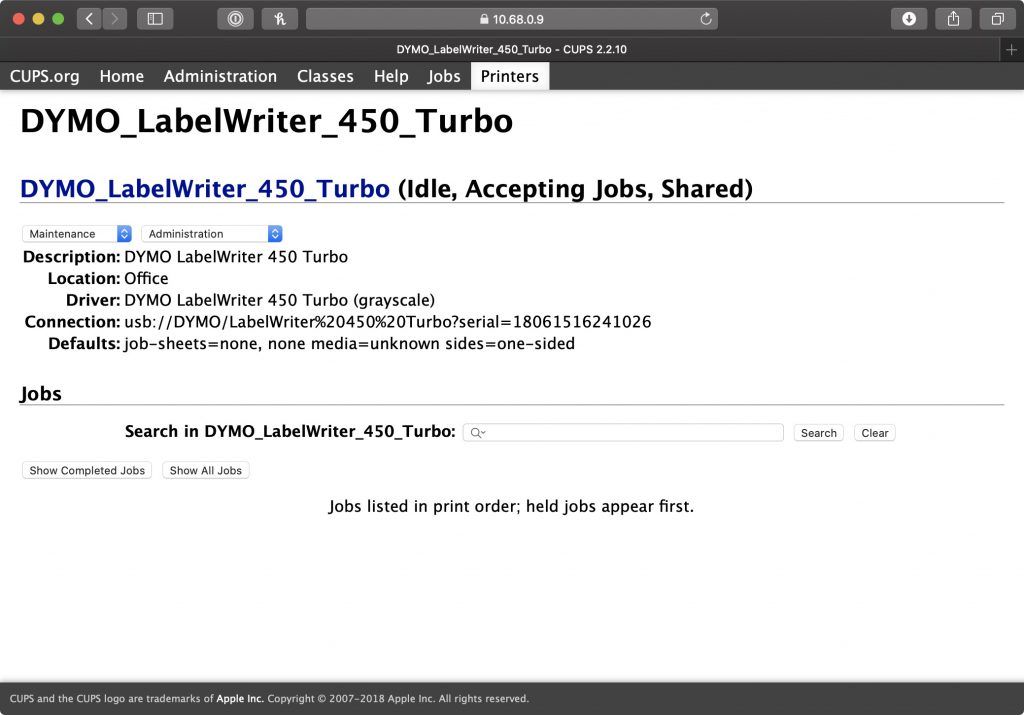
https://192.168.2.X:631/adminGo to Administration page and click Add Printer. Make sure that your printer is switch on and connected to your Pi via USB. Follow the prompts and setup the printer. Before the final step, ensure that you check the “share this printer” checkbox. Finally, you can print a test page on Printers page to verify if everything works.

PS: After adding a printer, there was a problem occurred. For some reason, the printer would only print first few X jobs, and ignore the remaining jobs. To continue printing, I had to either restart my Pi, or restart my printer. The following command fixed my problem:
# Replace PRINTERNAME with the name used in step 7. Eg: m1136
lpadmin -p PRINTERNAME -o usb-no-reattach-default=true

# Restart your Pi
sudo reboot
Python3 CUPS example #
Python
#!/usr/bin/python3
import time, pprint, cups

conn = cups.Connection()
printers = conn.getPrinters ()
pprint.pprint(printers)
print()

printer = conn.getDefault()
print("Default1:", printer)

if printer == None:
    printer = list(printers.keys())[0]
    print("Default2:", printer)

myfile = "test.txt"
pid = conn.printFile(printer, myfile, "test", {})
while conn.getJobs().get(pid, None) is not None:
    time.sleep(1)
#done
source(s):
https://johnathan.org/configure-a-raspberry-pi-as-a-print-server-for-dymo-label-printers/
https://medium.com/@anirudhgupta281998/setup-a-print-server-using-raspberry-pi-cups-part-2-2d6d48ccdc32
https://python-forum.io/thread-15230.html
Using NodeJS (node-dymo-printer) #
A library / module to print labels from Node.js. Pure javascript cross-platform with no platform specific dependencies. There is no need to install the DYMO SDK or DYMO Webservices.
It has been tested to work on Windows 10, macOS (Big Sur 11.6, Monterey 12.1) and Ubuntu 21.10.
Developed for the DYMO LabelWriter 450, but might also work for other models.
Initialize #
1. Create a new project directory
Open your terminal (Command Prompt, Git Bash, etc.), and run the following commands:
mkdir myapp  # Creates a new folder named 'myapp'
cd myapp     # Moves into the new 'myapp' folder
npm init     # Initializes a new Node.js project
When prompted, you can hit Enter multiple times to accept the default settings. This will create a package.json file that helps manage the project’s dependencies.
2. Install the node-dymo-printer module
Once inside the myapp folder, install the necessary module by running:
npm install node-dymo-printer
This will download and add the node-dymo-printer module to your project.
3. Run a demo script
Now, you can try running one of the example scripts provided below. For example, after adding the demo1.js file to your project folder (myapp), run:
node demo1.js
Examples #
demo1.js: Tries to find the DYMO label printer automatically and prints “Hello world!”.demo2.js: Similar to the first one, instead that the configuration contains the printer connection details.demo3.js: Show a list of all installed printers.demo4.js: Load an image and print it as label.
Code excerpt to print a text label.
See the demo<n>.js files for all the details.
// Create landscape image with the dimensions of the label and with the text "Hello World!".
const {imageWidth, imageHeight} = DymoServices.DYMO_LABELS['89mm x 36mm'];
const image = await createImageWithText(imageWidth, imageHeight, 0, 128, 'Hello World!');

// Print it, just one label.
// We use an empty config object, so dymoServices tries to find the label printer automagically.
await new DymoServices({}).print(image, 1);
Manual printer configuration #
The printer configuration is optional. When initialized with an empty configuration object, it tries to find the DYMO Label Writer.
For manual configuration, those interfaces are supported: “NETWORK”, “CUPS”, “WINDOWS” and “DEVICE”.
// Network example (Linux, Windows, macOS).
new DymoServices({
    interface: 'NETWORK',
    host: '192.168.1.229',
    port: 9100
});

// USB device example (linux).
new DymoServices({
    interface: 'DEVICE',
    device: '/dev/usb/lp0'
});

// CUPS example (macOS, linux).
new DymoServices({
    interface: 'CUPS',
    deviceId: 'DYMO_LabelWriter_450'
});

// Windows example.
new DymoServices({
    interface: 'WINDOWS',
    deviceId: 'DYMO LabelWriter 450'
});
On Linux, to grant access to device /dev/usb/lp0, execute the following command and restart the system:
# sudo adduser <username> lp
References and remarks #
For image processing, this library makes use of Jimp. An image processing library for Node written entirely in JavaScript, with zero native dependencies.
For Windows, it uses an executable named RawPrint.exe to write directly to a printer bypassing the printer driver. For details about this project, see RawPrint
The source code to list all printers in Windows, is borrowed from this project: pdf-to-printer
DYMO LabelWriter 450 Series Printers Technical Reference Manual
This npm module is compatible with both commonJS and ESM. How to Create a Hybrid NPM Module for ESM and CommonJS
Source @ Github: https://github.com/kozmoz/node-dymo-printer
Example – PNG image print #
const {DymoServices, loadImage} = require('node-dymo-printer');

(async function () {

    // Printer connection details.
    const config = {
        interface: 'NETWORK',
        host: '192.168.2.66',
        port: 9100
    };

    // Load image.
    const image = await loadImage(__dirname + '/image.png');

    // Print the label.
    try {
        const dymoServices = new DymoServices(config);
        await dymoServices.print(image, 1);
        console.log('Successfully printed');
    } catch (e) {
        console.error('Error while trying to print the image: ', e);
    }

})();
Example – PNG image print with commandline arguments #
example command:
node demo.js -interface NETWORK -host 192.168.2.66 -port 9100 -image /home/pi/image.pngconst {DymoServices, loadImage} = require('node-dymo-printer');
// Haal de command-line arguments op, sla index 0 en 1 over (node en scriptnaam)
const args = process.argv.slice(2);
(async function () {
// Printer connection details.
const config = {};
// Parse arguments
for (let i = 0; i < args.length; i++) {
switch (args[i]) {
case "-interface":
if (args[i + 1]) config.interface = args[++i];
break;
case "-host":
if (args[i + 1]) config.host = args[++i];
break;
case "-port":
if (args[i + 1]) config.port = args[++i];
break;
case "-image":
if (args[i + 1]) config.image = args[++i];
break;
default:
console.log(`Unknown argument ignored: ${args[i]}`);
}
}
// Load image.
const image = await loadImage(config.image);
// Print the label.
try {
const dymoServices = new DymoServices(config);
await dymoServices.print(image, 1);
console.log('Successfully printed');
} catch (e) {
console.error('Error while trying to print the image: ', e);
}
})();