Knowledge Center
Roblox communication with Node-Red
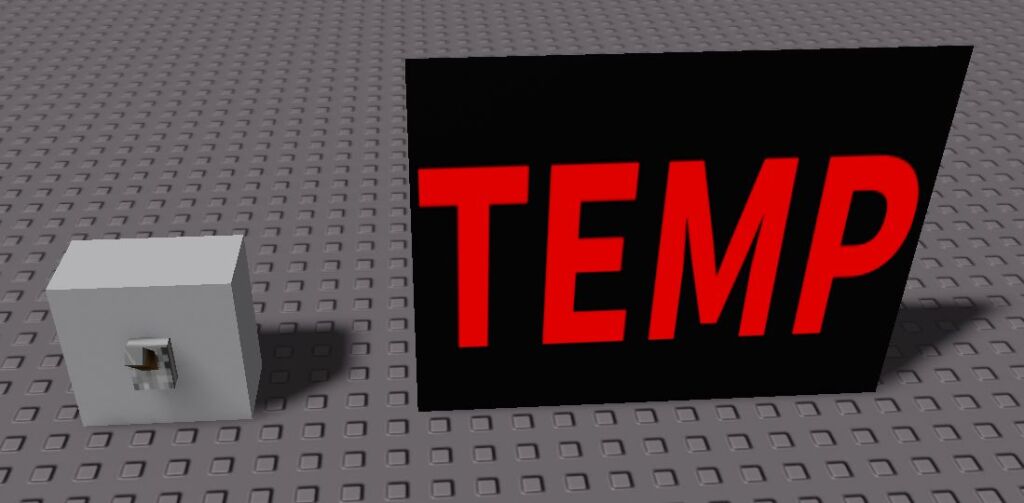
In this example we are going to send data with GET and POST commands from Roblox to Node-Red, from there we can output to MQTT and do in-real-life things with it.
Proof-of-Concept (to examine) #
Download this Roblox Example baseplate and open it in studio
Download this flow for node-red to communicate

FLOW:
[
    {
        "id": "eb8d1610d554dfc7",
        "type": "http in",
        "z": "f6407c7dd7ea01ac",
        "name": "ROBLOX switch (/led)",
        "url": "/led",
        "method": "post",
        "upload": false,
        "swaggerDoc": "",
        "x": 180,
        "y": 160,
        "wires": [
            [
                "567df5fdf351d99d",
                "110e1344595000bd"
            ]
        ]
    },
    {
        "id": "567df5fdf351d99d",
        "type": "debug",
        "z": "f6407c7dd7ea01ac",
        "name": "DEBUG",
        "active": true,
        "tosidebar": true,
        "console": false,
        "tostatus": true,
        "complete": "payload",
        "targetType": "msg",
        "statusVal": "payload",
        "statusType": "auto",
        "x": 420,
        "y": 160,
        "wires": []
    },
    {
        "id": "97d9d9dc81b21f6e",
        "type": "http in",
        "z": "f6407c7dd7ea01ac",
        "name": "ROBLOX temp (/temp)",
        "url": "/temp",
        "method": "get",
        "upload": false,
        "swaggerDoc": "",
        "x": 180,
        "y": 260,
        "wires": [
            [
                "87d556486ff8231a"
            ]
        ]
    },
    {
        "id": "87e77ce02658d132",
        "type": "http response",
        "z": "f6407c7dd7ea01ac",
        "name": "ENDPOINT",
        "statusCode": "",
        "headers": {},
        "x": 610,
        "y": 260,
        "wires": []
    },
    {
        "id": "87d556486ff8231a",
        "type": "function",
        "z": "f6407c7dd7ea01ac",
        "name": "Random number",
        "func": "msg.payload = {\n    \"temp\": Math.round(Math.random() * 30)\n}\nreturn msg;",
        "outputs": 1,
        "timeout": "",
        "noerr": 0,
        "initialize": "",
        "finalize": "",
        "libs": [],
        "x": 410,
        "y": 260,
        "wires": [
            [
                "87e77ce02658d132"
            ]
        ]
    },
    {
        "id": "110e1344595000bd",
        "type": "http response",
        "z": "f6407c7dd7ea01ac",
        "name": "ENDPOINT",
        "statusCode": "",
        "headers": {},
        "x": 430,
        "y": 100,
        "wires": []
    },
    {
        "id": "c4bd0c10ed7c76ae",
        "type": "http in",
        "z": "f6407c7dd7ea01ac",
        "name": "ROBLOX wallclick (/wallclick)",
        "url": "/wallclick",
        "method": "get",
        "upload": false,
        "swaggerDoc": "",
        "x": 200,
        "y": 420,
        "wires": [
            [
                "7db8e1bf98e27a75",
                "dacb8d7f89d1abca"
            ]
        ]
    },
    {
        "id": "7db8e1bf98e27a75",
        "type": "debug",
        "z": "f6407c7dd7ea01ac",
        "name": "DEBUG",
        "active": true,
        "tosidebar": true,
        "console": false,
        "tostatus": true,
        "complete": "payload",
        "targetType": "msg",
        "statusVal": "payload",
        "statusType": "auto",
        "x": 440,
        "y": 420,
        "wires": []
    },
    {
        "id": "dacb8d7f89d1abca",
        "type": "http response",
        "z": "f6407c7dd7ea01ac",
        "name": "ENDPOINT",
        "statusCode": "",
        "headers": {},
        "x": 450,
        "y": 360,
        "wires": []
    }
]
Note: Where to place scripts?
| Locatie | Acces from | Gebruik voor |
|---|---|---|
ReplicatedStorage | Server & Client | Config or modules everybody could load |
ServerScriptService | Only Server | Config or modules only the server uses (like secret tokens, internal url, etc.) |
Server config #
game.ServerScriptService.ServerConfigModule
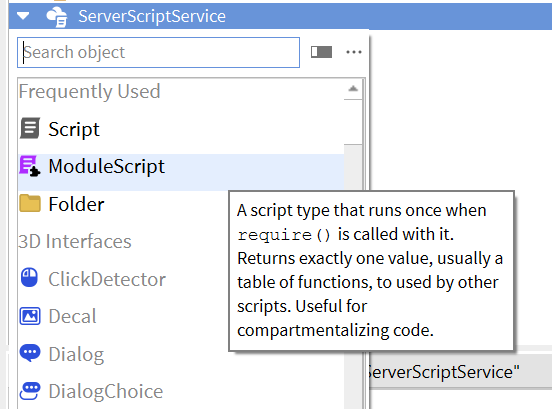
In this map we can place some global variable we can use in other scripts, make sure it is a ModuleScript, a normal “script” won’t work!
Create a modulescript with the name ServerConfigModule:
Contents:
local config = {}
print("Running: Roblox and Node-Red communication example.")

-- Server configuration variables
config.BaseURL = "http://raspberrypi.local:1880"

print("Communicating with IP: " .. config.BaseURL)

return config
HTTP GET data #
game.ServerScriptService.TemperatureScript
Now, to get the temperatures with a HTTP GET command, create a normal script in game.ServerScriptService named: TemperatureScript, with the contents:
local HttpService = game:GetService("HttpService")
-- Load config settings
local config = require(game.ServerScriptService.ServerConfigModule)
while true do
-- Use a GET request to fetch the JSON data
local jsonString = HttpService:GetAsync(config.BaseURL .. "/temp")
local data = HttpService:JSONDecode(jsonString);
print("De temperatuur is: " .. data.temp)
Workspace.Sign.SurfaceGui.SIGN.Text = data.temp
wait(1)
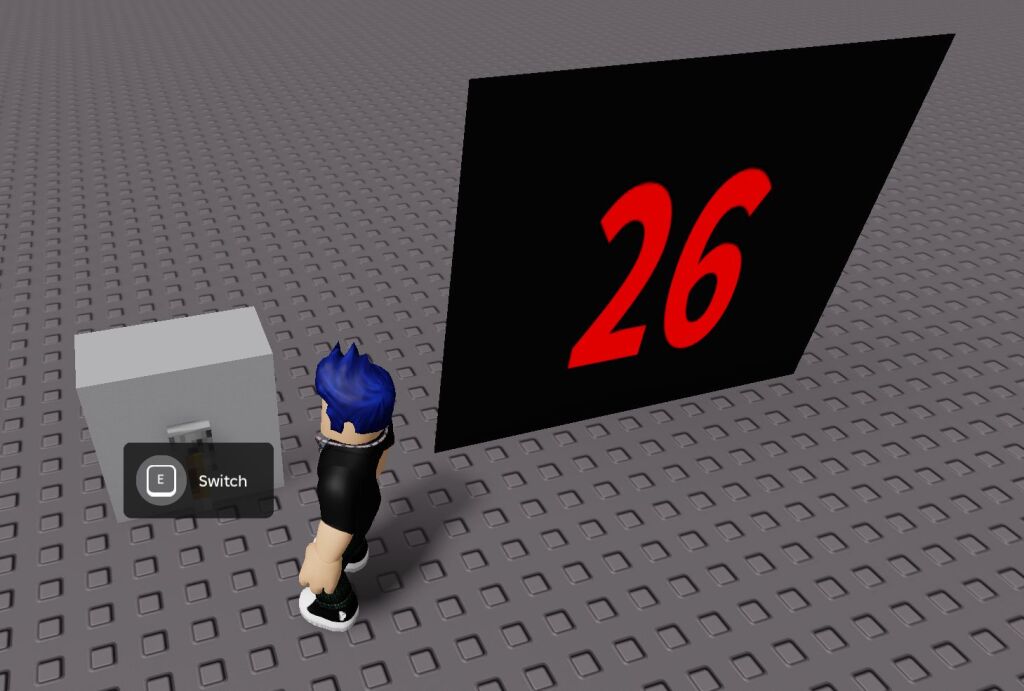
endThis will pull the temperature with GET from your Node-red startpoint (with a random number generator as example)
If everything is working well you can press the play button and see the value on the wall/sign change every second.
HTTP GET to send data #
game.ServerScriptService.WallClickScript
Now, to send data when clicking on an object (in this example a wall) with a HTTP GET command, create a normal script in game.ServerScriptService named: WallClickScript, with the contents:
-- Load config settings
local config = require(game.ServerScriptService.ServerConfigModule)

Workspace.WallOn.ClickDetector.MouseClick:connect(function()
	http = game:GetService("HttpService")
	http:GetAsync(config.BaseURL .. "/wallclick?clicked=true")
end)
This will execute a GET command with data to your Node-red startpoint
If everything is working well you can press wall where the lever is mounted to, and see the value “clicked=true” back in node-red.
HTTP POST to send data #
To send data we need an interactive object such as a lever, in this case there is a “triggered” Interactscript at: workspace.Lever.Stick.Switchprompt
workspace.Lever.Stick.Switchprompt.Interactscript
contents:
local function OnTriggered()
	workspace.Lever.SwitchBF:Invoke()
end

workspace.Lever.Stick.SwitchPrompt.Triggered:Connect(OnTriggered)
To send data we need the PostAsync function, this is the SwitchScript in game.ServerScriptService
game.ServerScriptService.SwitchScript
Contents:
local Lever = workspace.Lever
local Stick = Lever.Stick
local SwitchBF = Lever.SwitchBF
local OriginalCFrame = Stick.CFrame
local Offset = CFrame.new(-0.74798584, -0.748016357, 0, 0, -0.999999881, 0, 0.999999881, 0, 0, 0, 0, 1)
-- Load settings from Script in ServerScriptService
local config = require(game.ServerScriptService.ServerConfigModule)
local function Switch()
local ValueAtt = Lever:GetAttribute("Value")
if ValueAtt == true then
Lever:SetAttribute("Value", false)
Stick.CFrame = Stick.CFrame:ToWorldSpace(Offset)
local http = game:GetService("HttpService")
local api = config.BaseURL .. "/led"
print(api)
local auth = ""
local data = {
['data'] = 'LEDON'
}
local encodedData = http:JSONEncode(data)
http:PostAsync(api, encodedData, Enum.HttpContentType.ApplicationJson, false)
print("on")
else
Lever:SetAttribute("Value", true)
Stick.CFrame = OriginalCFrame
local http = game:GetService("HttpService")
local api = config.BaseURL .. "/led"
local auth = ""
local data = {
['data'] = 'LEDOFF'
}
local encodedData = http:JSONEncode(data)
http:PostAsync(api, encodedData, Enum.HttpContentType.ApplicationJson, false)
print("on")
end
end
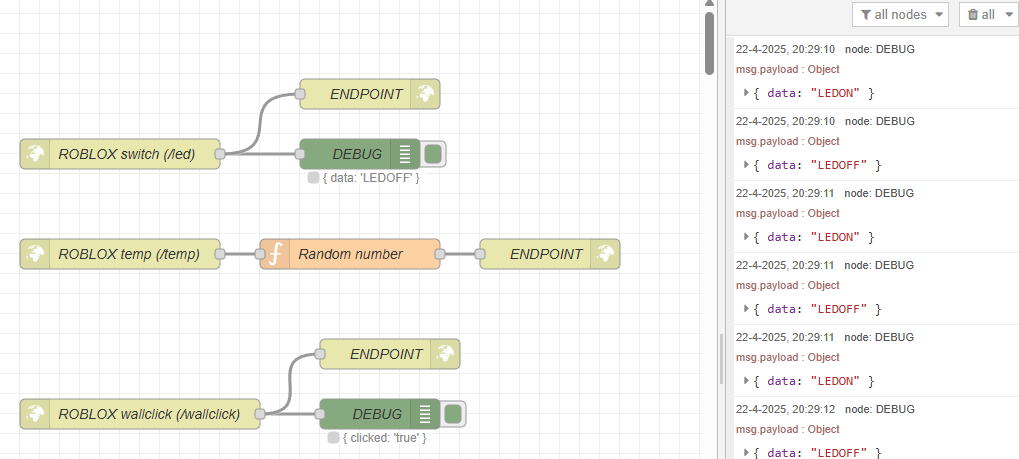
SwitchBF.OnInvoke = SwitchNow when you start the game and walk to the lever switch you see you can interact with it by pressing “E”:
You will see the messages in Node-Red:
Pullrate limits #
Please note the limits (for Live Games): #
| Soort | Limiet |
|---|---|
| HTTP-calls in server place (server) | 500 per minute |
| HTTP-calls for player (client) | 100 per minute |
| Payload size (POST) | 256 KB |
| Timeout | ~10 seconds |